
Setting up Outlook Using an NMU Email Address
This page covers instructions for setting up Outlook to use the older NMU email system in use before NMU switched to NMU G Suite and gmail. These instructions are left available for anyone that needs to set up Outlook to access the older email system. It is highly recommended you Opt into NMU G Suite if you haven't already done so and use gmail for your NMU mail instead of configuring Outlook to access the older NMU email system. If you opt into NMU G Suite and still want to use Outlook, use the setup instructions at "Adding a gmail account to Outlook using IMAP".
1. Ensure that Outlook is closed and you are connected to the internet.
2. Click on the Start Menu icon on your taskbar, search "Control Panel" and choose the "Control Panel" control panel option from the list.
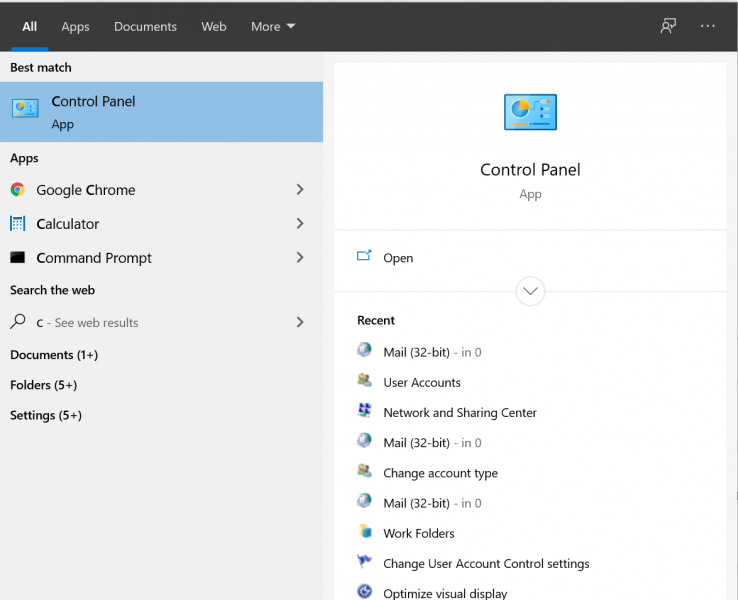
2. Click on the Start Menu icon on your taskbar, search "Control Panel" and choose the "Control Panel" control panel option from the list.
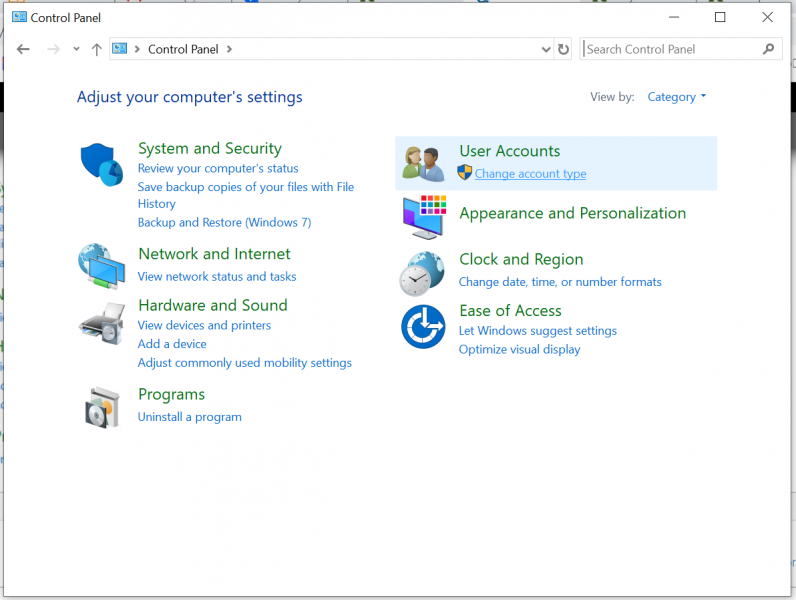
2. Select "User Accounts"
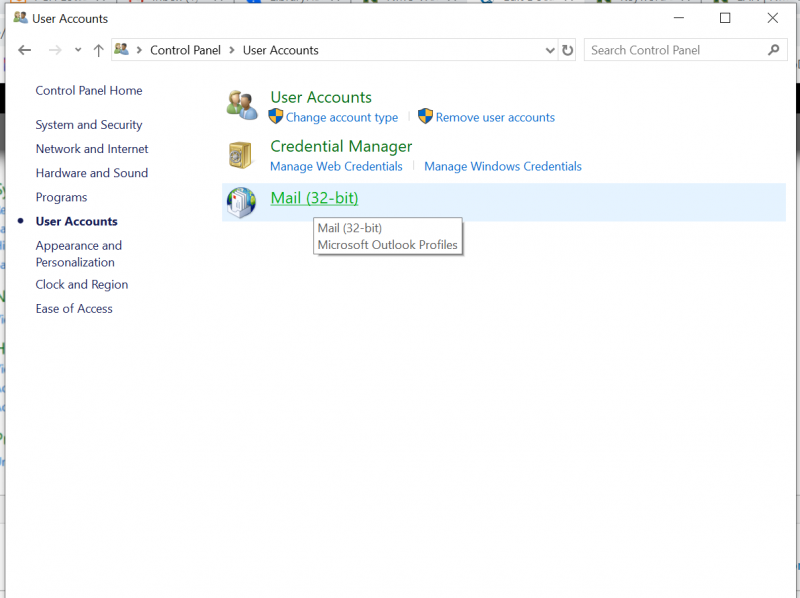
3.Select "Mail (32-Bit)"
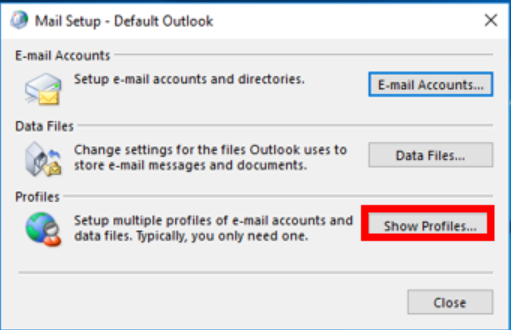
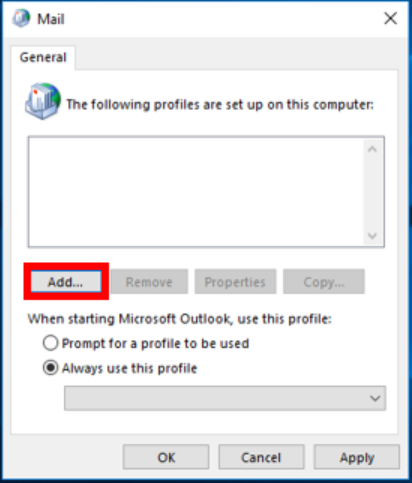
4. Select "Show Profiles" from the "Mail Setup" window.
5. Click the "Add..." button to create a new profile. Enter a profile name in the "New Profile" box and click "OK."
5. Click the "Add..." button to create a new profile. Enter a profile name in the "New Profile" box and click "OK."
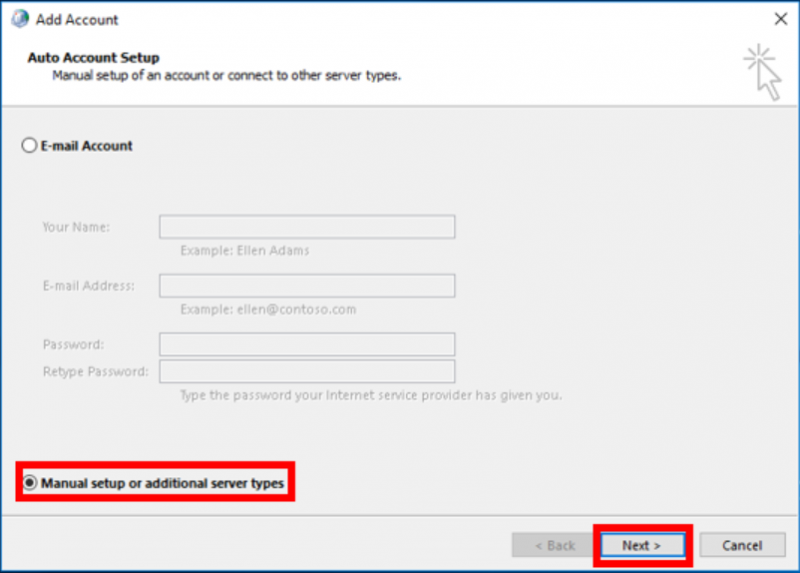
6. In the new window that opens, choose "Manual setup or additional server types," then click the "Next" button.
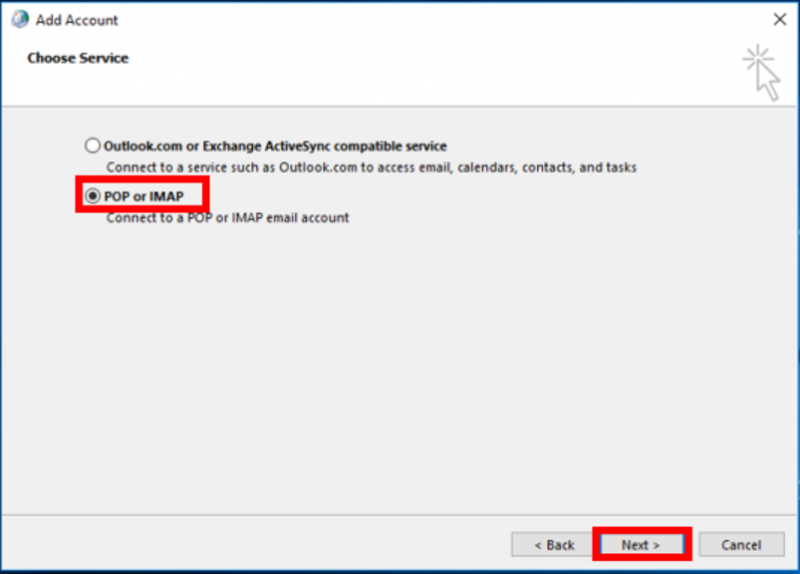
7. Select "POP or IMAP" and click "Next."
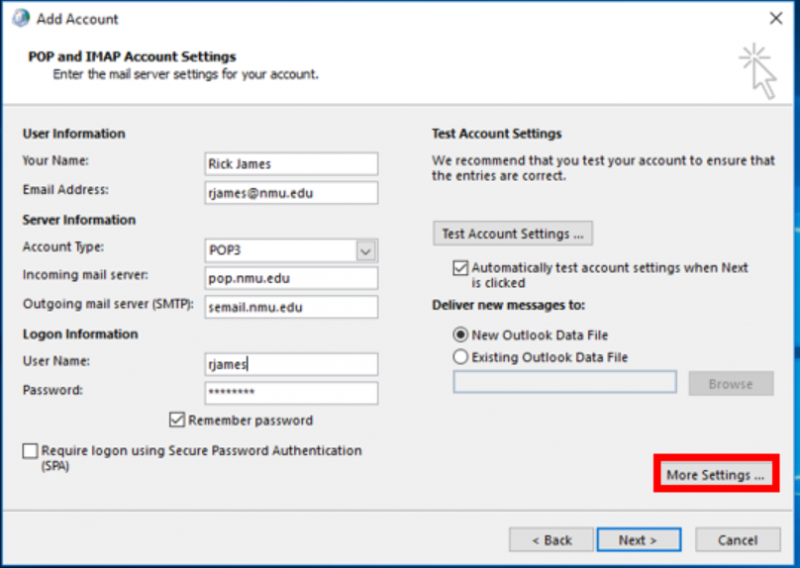
8. In the "Add Account" window, enter the information as follows in the fields, then click "More Settings..."
Your Name: your name
Email Address: yourid@nmu.edu
Account Type: POP3
Incoming Mail Server: pop.nmu.edu
Outgoing Mail Server (SMTP): semail.nmu.edu
User Name: yourid
Password: your nmu account password
9. In the "Internet E-mail Settings" window, select the "Outgoing Server" tab.

10. Check "My outgoing server requires authentication" and "Use same settings as my incoming mail server," then click the "Advanced" tab.
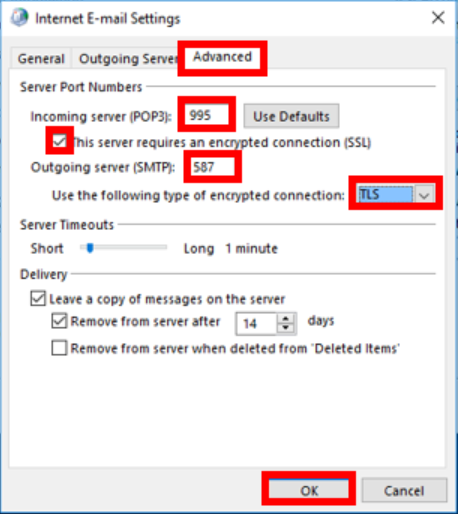
11. Click the "Advanced" tab, enter the settings as follows, then click "OK."
Incoming server (POP3): 995
This server requires an encrypted connection (SSL): Checked
Outgoing Server (SMTP): 587
Use the following type of encrypted connection: TLS
12. The smaller window will close. Click "Next" on the "Add Account" window and wait for Outlook to test the settings.
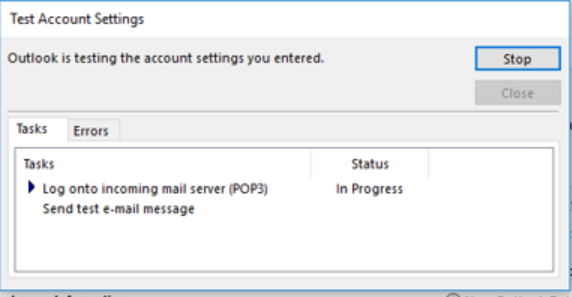
13. When the test completes, click "Close" and then "Finish" (If the test fails, ensure that you've entered everything correctly, including your username and password).
13. You can now open Outlook and view your mail.
Rate this Article: