Adding an IMAP Account to an Existing Outlook Profile
The instructions below add IMAP access to your NMU account to your existing Outlook profile. This will allow Outlook access to the messages and folders available in Webmail, including the ‘Sent’ folder containing mail you have previously sent using Webmail. These instructions are written to work for most people using an NMU issued computer. If you have any questions please contact the NMU HelpDesk.
1. Open Outlook on your NMU issued computer. If this is the first time Outlook is opened, it will create the account information for accessing your NMU Email as a POP/SMTP account. You do not need to enter your NMU password to access the mail using the POP/SMTP account.
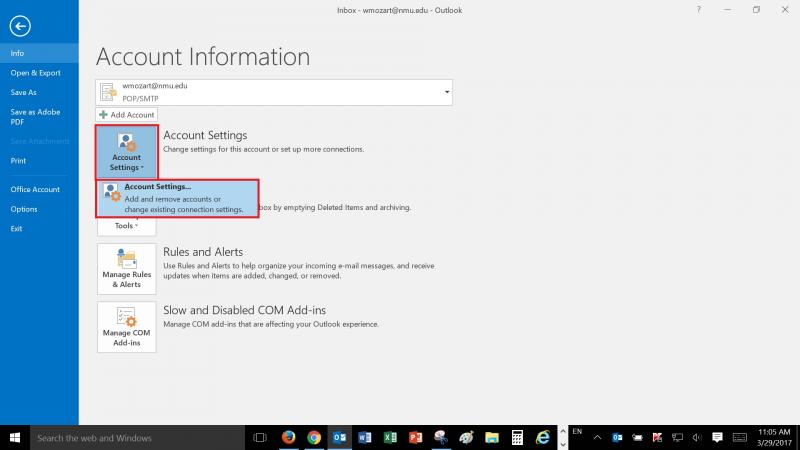
2. In Outlook, go to "File", "Account Settings", "Account Settings". The "Account Settings" window will open.
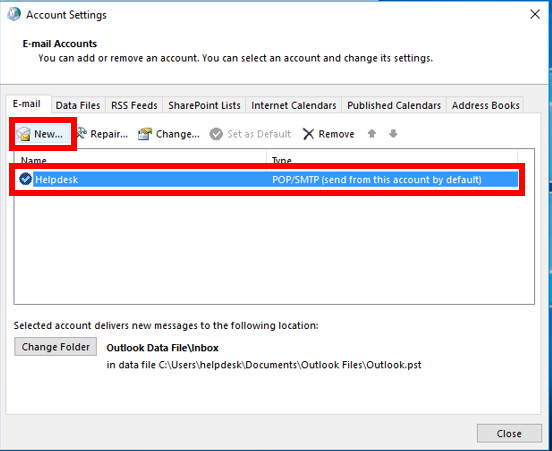
3. Select your email account to highlight it, then select the "New" button.
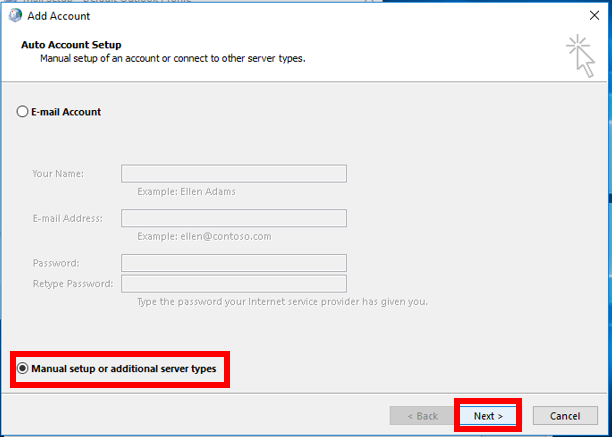
4. Select "Manual setup or additional server types", then click "Next" and select "POP or IMAP."
5. Enter your name and NMU email address, YourID@nmu.edu. Select "IMAP" from the drop-down menu and enter "imap.nmu.edu" in the incoming server field. Enter "semail.nmu.edu" in the "Outgoing mail server (SMTP)" field. Enter your username, "YourID" (without the @nmu.edu) and your NMU password.
2. In Outlook, go to "File", "Account Settings", "Account Settings". The "Account Settings" window will open.

3. Select your email account to highlight it, then select the "New" button.

4. Select "Manual setup or additional server types", then click "Next" and select "POP or IMAP."

5. Enter your name and NMU email address, YourID@nmu.edu. Select "IMAP" from the drop-down menu and enter "imap.nmu.edu" in the incoming server field. Enter "semail.nmu.edu" in the "Outgoing mail server (SMTP)" field. Enter your username, "YourID" (without the @nmu.edu) and your NMU password.
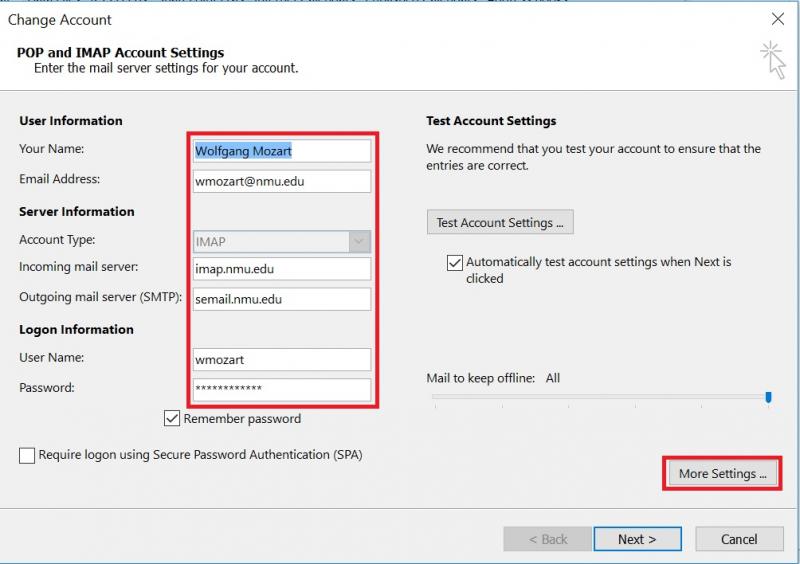
8. Click the "More Settings" button.
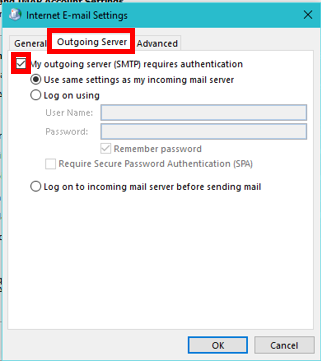
9. In the "Outgoing Server" tab, check "My outgoing server requires authentication."
10. In the "Advanced" tab, enter the following settings:
- Check the "This server requires and encrypted connection (SSL)" checkbox.
- Incoming server (IMAP): 993
- Outgoing Server (SMTP): 587
- Select "TLS" for "Use the following type of encrypted connection".
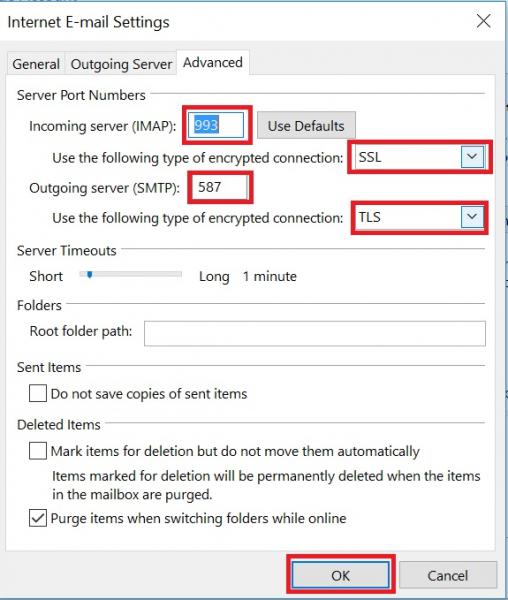
11. Click "OK" to close this window, then click "Next."
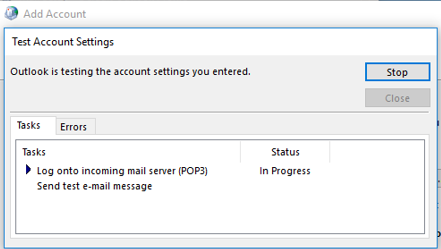
12. The "Test Account Settings" window will now open. If all the information is correct in the previous window both should say "Completed". Click "Close" to close this window.
13. A window should appear saying "You're all set!" You may now click the "Finish" button and open Outlook.

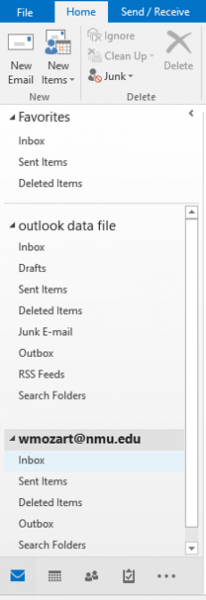
14. In Outlook, you should now see your IMAP email account in the folder navigation pane to the left and the contents from Webmail should become available within 20 minutes.
Rate this Article:
