Creating Rules in Outlook
According to a 2012 report the Mckinsey Global Institute found that, on average, workers spent 28% of their work week reading and answering e-mails. Staying organized is extremely important when trying to use your email efficiently. Outlook gives us the opportunity to organize those e-mails in order to work more efficiently using rules and folders. It is important to note, however, that unless you are a faculty or staff member using a Microsoft Exchange account these folders and rules are only available on the machine that you create them on.
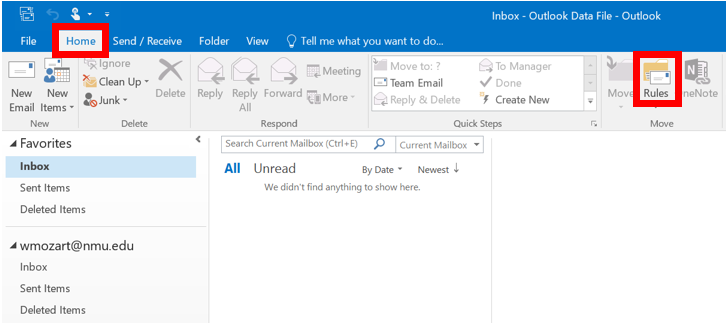
1. In the "Home" tab, click "Rules" and then "Manage Rules & Alerts."
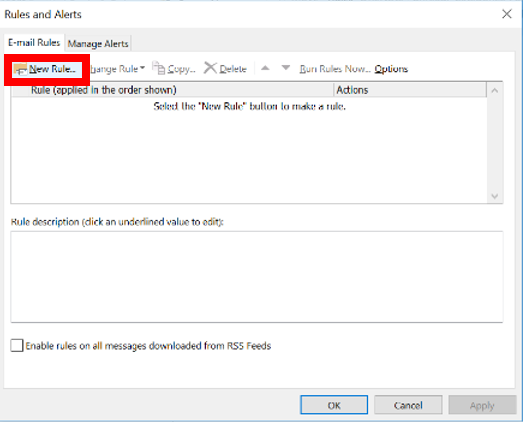
2. In the "Rules and Alerts" dialog box, under the "Email Rules" tab, click "New Rule."
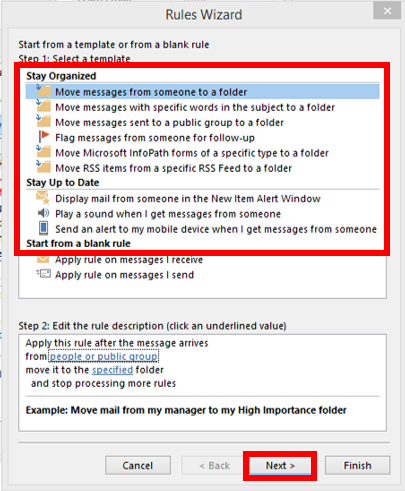
3. Under "Step 1: Select a template", select the template that you want from the "Stay Organized" or "Stay Up to Date" collection of templates.In this example we chose the “Move messages from someone to a folder” template from the “Stay Organized” collection. Click “Next”.
4. Under "Step 2: Edit the rule description", click the "people or public group" link, the Address Book will open.
.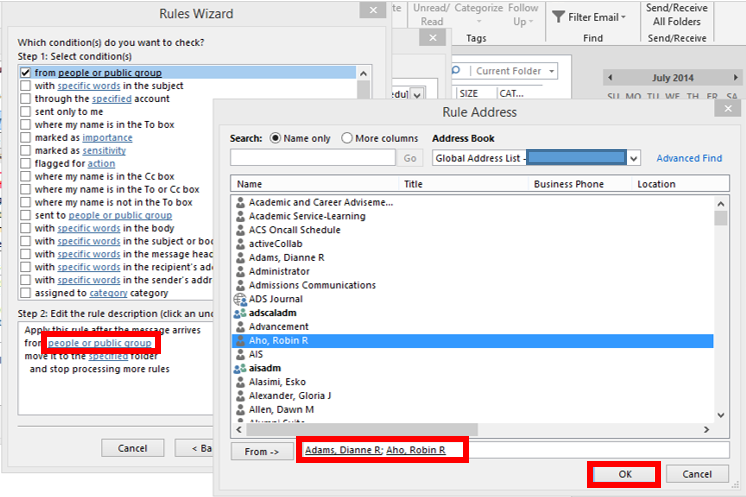
5. Double click names in the list to select them so they are displayed in the "From ->" field at the bottom of the window. You can add more than one name. Click "OK" after you are done adding names.
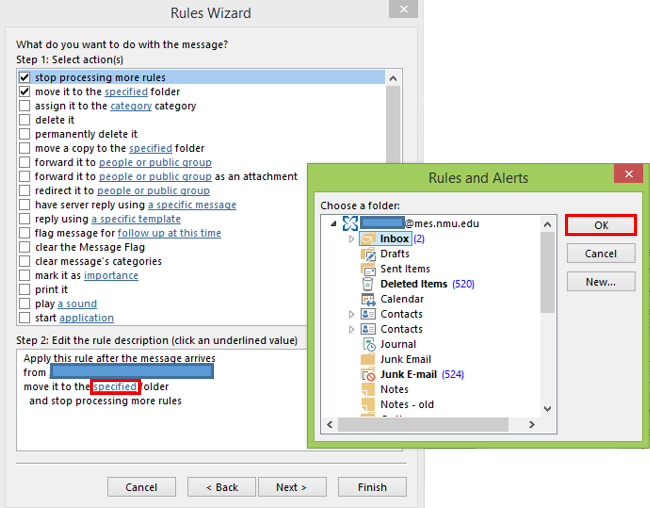
6. Under "Step 2: Edit the rule description", click an underlined value for “specified” folder and a window will open with the list of available folders.
7. Select the folder you would like to move the messages for this rule to, and select "OK."
1. In the "Home" tab, click "Rules" and then "Manage Rules & Alerts."
2. In the "Rules and Alerts" dialog box, under the "Email Rules" tab, click "New Rule."

3. Under "Step 1: Select a template", select the template that you want from the "Stay Organized" or "Stay Up to Date" collection of templates.In this example we chose the “Move messages from someone to a folder” template from the “Stay Organized” collection. Click “Next”.

4. Under "Step 2: Edit the rule description", click the "people or public group" link, the Address Book will open.
.

5. Double click names in the list to select them so they are displayed in the "From ->" field at the bottom of the window. You can add more than one name. Click "OK" after you are done adding names.
6. Under "Step 2: Edit the rule description", click an underlined value for “specified” folder and a window will open with the list of available folders.
7. Select the folder you would like to move the messages for this rule to, and select "OK."
9. Click "Run rules now” if you want the rule to process existing mail in the mailbox. Otherwise click "Finish."
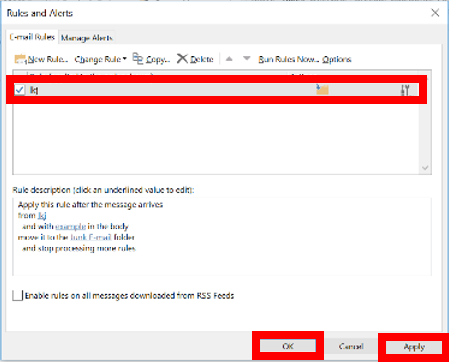
10. Click "Apply" then "OK" to finish adding and editing rules.
Rate this Article:
Documentation Category:

