
YeaComm P10 Indoor Device Instructions
- Connecting to the Yeacomm P10 WiFi
- Changing the SSID and Network Key to Secure the Yeacomm P10 (Recommended)
- Verifying signal strength
Plug in the AC adapter to the wall outlet and to the round power connection on the side of the device. The power light should be blue indicating power is on. Within 5 minutes the Wi-Fi light should blink blue and will be visible on your device.
Connecting to the Yeacomm P10 WiFi
1. Start your computer, smartphone, tablet, or other device. Using its settings to connect via WiFi to the “cpe-#####” access point. This should match the information on the back of the router. The default password to connect is printed and located on the back of the router next to WiFi KEY:
2. Once you are connected to the router, open your web browser and use the URL bar at the top to navigate to the webpage “192.168.#.#”. This number will be located on the back of the router labeled “IP address”.
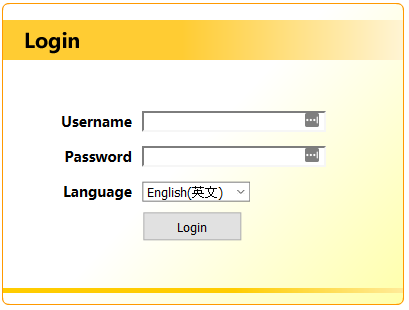
3. Log into the router by using the default username: admin and password: admin
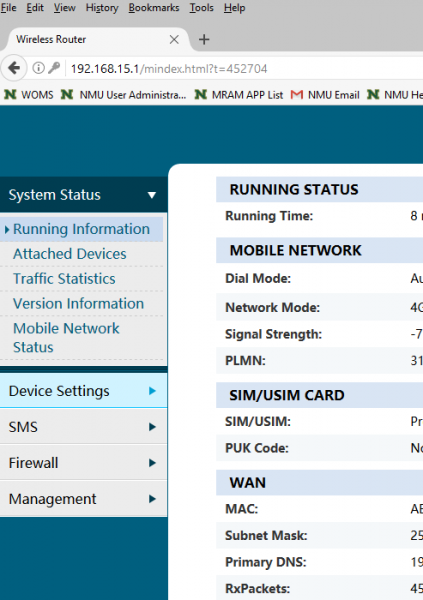
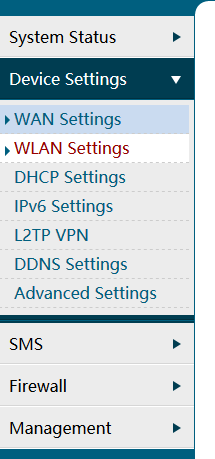
4. You will see the routers configuration page, use the side bar and click on Device Settings.
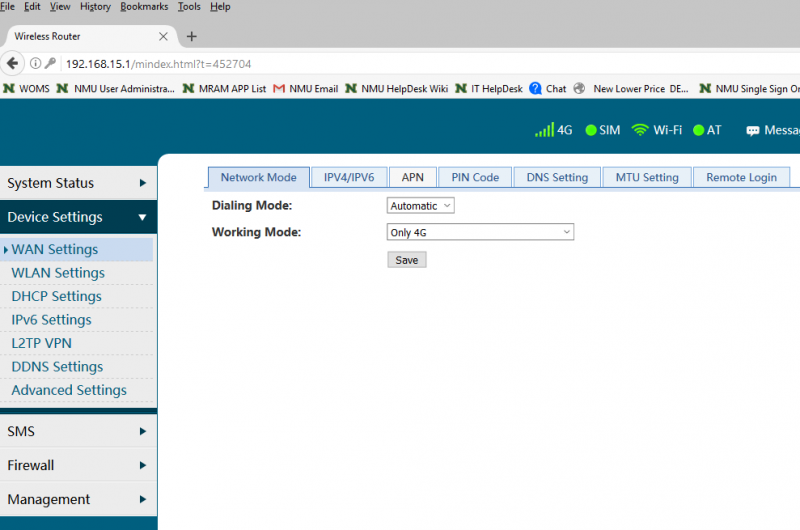
5. Once there, click on the tab labeled APN to configure the routers APN settings.
6. You will see a table with a (Default) profile name. Click Edit on the left of that profile name.
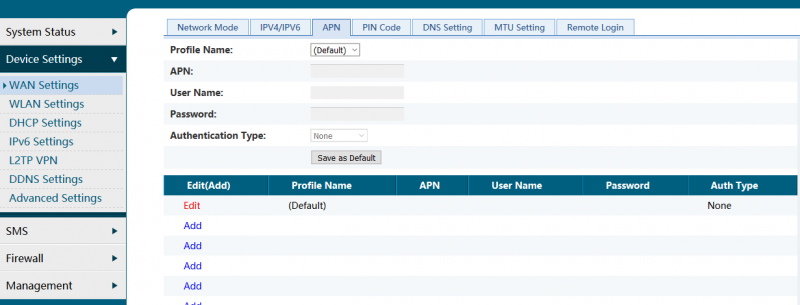
7. A window will pop up to edit the current profile. Use the following settings:
a. Profile name:
b. APN: nmulte
c. User Name:
d. Password:
e. Authentication Type: None
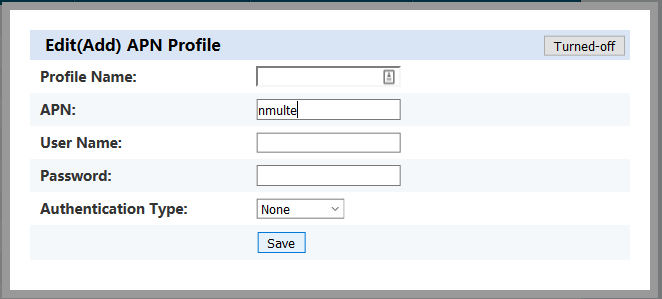
Click Save to save your settings.
8. Now, go to register.nmu.edu using the URL bar on top, register your device, and your LTE device is ready to go.
Changing the SSID and Network Key to Secure the Yeacomm P10 (Recommended)
By default, the Wi-Fi Key is set by the router, and is found on the back of the router. We recommend changing the default settings.
1. Once you are connected to the router, open your web browser and use the URL bar at the top to navigate to the webpage “192.168.#.#”. This number will be located on the back of the router labeled “IP address”.
2. Log into the router by using the default username: admin and password: admin
3. You will be brought to the routers configuration page, use the side bar and click on Device Settings.
4. Once there, it will default to WAN Settings, use the navigation pane on the left and select WLAN Settings.
5. Under these settings, you can change the SSID, or the name that is broadcast to the public, change the Security Key, or the password used to connect to the WiFi Router. Keep all other settings default. Be sure to remember the new SSID and password created!
6. Once you are finished, click Save. Your router will reboot, and you will need to connect to it again using the new information created.
Verifying signal strength
1. Start your computer, smartphone, tablet, or other device. Using its settings to connect via WiFi to the “cpe-#####” access point. This should match the information on the back of the router. The default password to connect is printed and located on the back of the router next to WiFi KEY:
2. Once you are connected to the router, open your web browser and use the URL bar at the top to navigate to the webpage “192.168.#.#”. This number will be located on the back of the router labeled “IP address”.
3. Log into the router by using the default username: admin and password: admin
4. You will see the routers configuration page, use the side bar and click on "Mobile Network Status" menu choice. The signal strength information will be displayed.
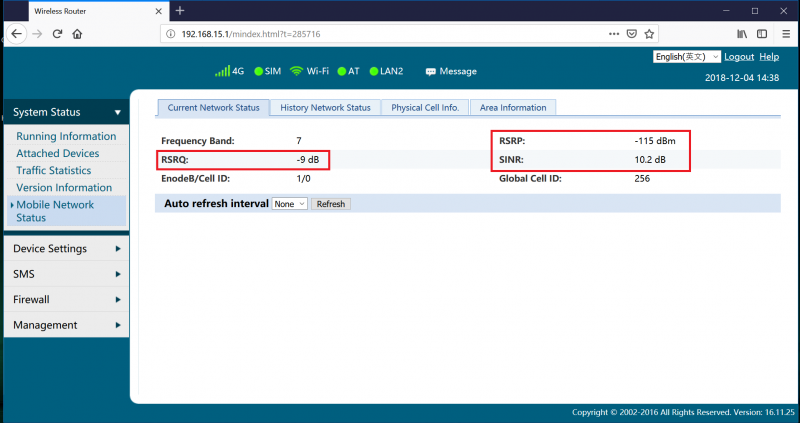
5. Record the RSRQ, RSRP, SINR values and compare them to the chart on the LTE Performance Troubleshooting page.