Check for a Static IP Address
A hard coded IP address is an IP address manually assinged in the settings of your machine that does not change. Unlike a dynamic address that can change with each lease update, a hard coded IP will be the same even after a full machine reset. This can be a source of problems on the network and for you if your machine is a mobile device that needs to use various IP addresses from different locations. Hard coded IPs are often used for servers, but should be avoided for a regular NMU computer.
If your IP address begins with 192 when on the NMU network then is a probably using a hard coded IP address. However, a hard coded IP is not limited to a 192.x.x.x IP address. If you are faculty or staff and require an unchanging static IP for an application or project, please contact the Computing Helpdesk.
To remove a hard coded IP address and use a dynamic address, click your operating system below.
Windows
Mac
Though these instructions use Windows 10, the steps are similar in earlier versions of windows.
If your IP address begins with 192 when on the NMU network then is a probably using a hard coded IP address. However, a hard coded IP is not limited to a 192.x.x.x IP address. If you are faculty or staff and require an unchanging static IP for an application or project, please contact the Computing Helpdesk.
To remove a hard coded IP address and use a dynamic address, click your operating system below.
Windows
Mac
Windows
Though these instructions use Windows 10, the steps are similar in earlier versions of windows.
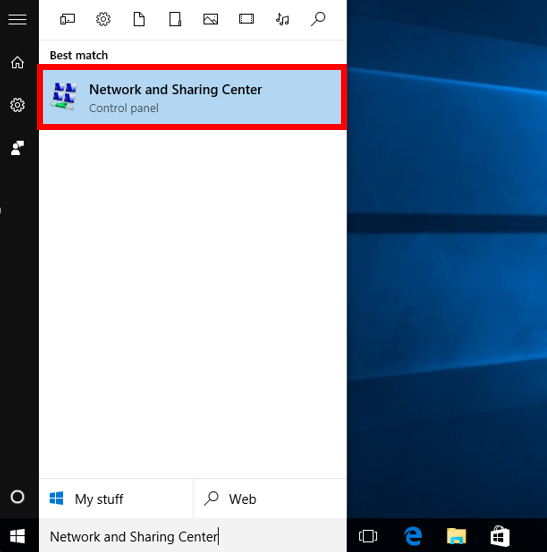
1. In the Start menu, search for and select the "Network and Sharing Center" option.
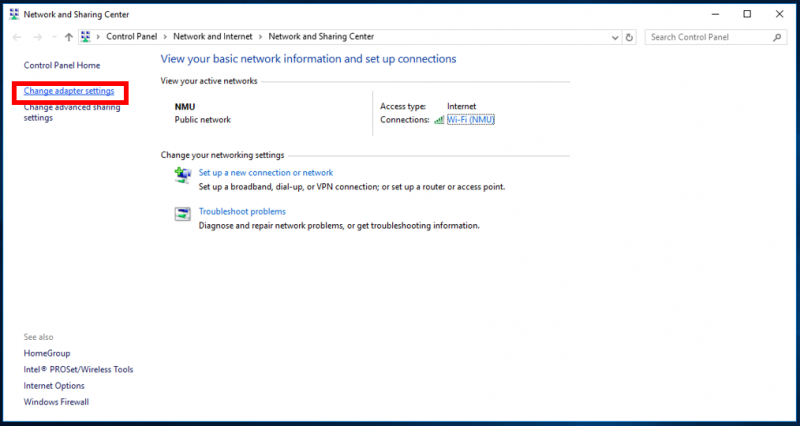
2. Click "Change Adapter Settings" on the left navigation pane.
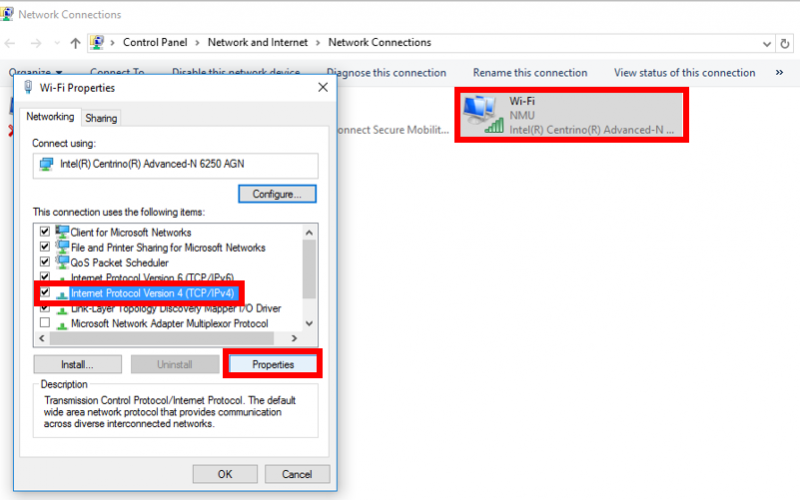
3. Right click on your wireless connection adapter (it will likely be the only one with the green internet icon) and select "Properties" from the drop-down menu.
4. This will open a new window. In the "Networking" tab, select "Internet Protocol Version 4 (TCP/IPv4)" and click the "Properties" button.
4. Click the radio buttons by "Obtain IP address automatically" and "Obtain DNS server address automatically" to ensure you have a dynamic IP address. Click "OK" to finish and close.

2. Click "Change Adapter Settings" on the left navigation pane.

3. Right click on your wireless connection adapter (it will likely be the only one with the green internet icon) and select "Properties" from the drop-down menu.
4. This will open a new window. In the "Networking" tab, select "Internet Protocol Version 4 (TCP/IPv4)" and click the "Properties" button.

4. Click the radio buttons by "Obtain IP address automatically" and "Obtain DNS server address automatically" to ensure you have a dynamic IP address. Click "OK" to finish and close.
Mac
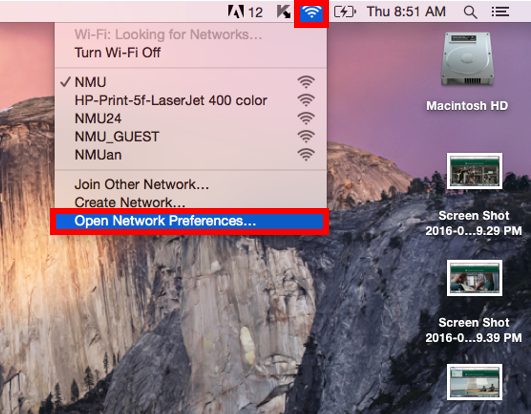
1. Select the WiFi icon and then click "Open Network Preferences."
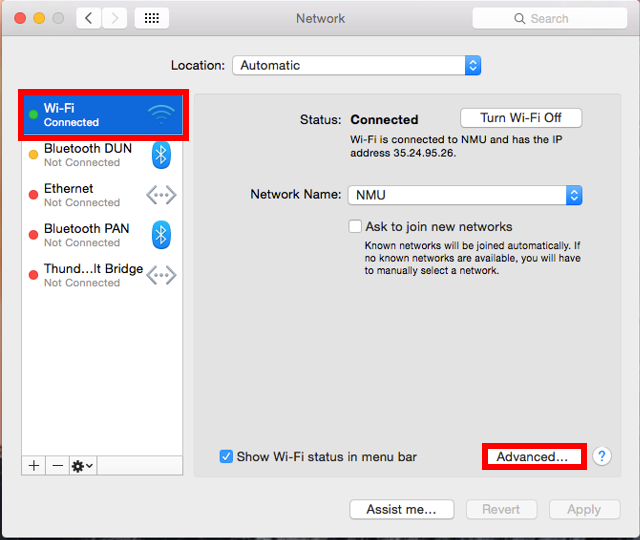
2. Select the Wi-Fi connection, then click the "Advanced" button.
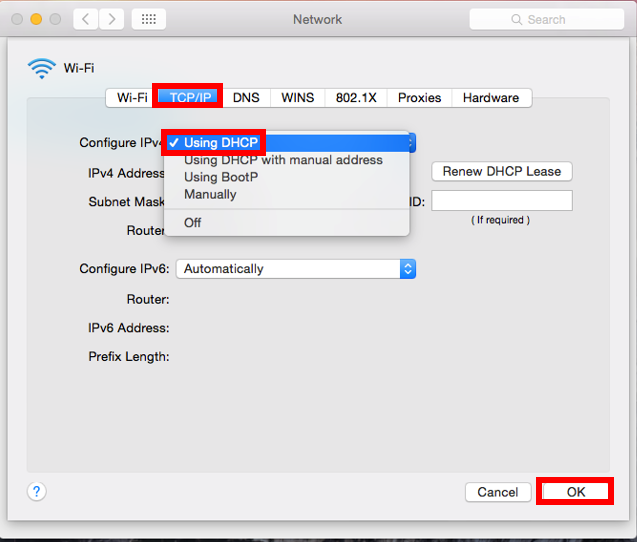
3. In the "TCP/IP" tab, select "Using DHCP" from the dropdown by "Configure IPv4" and click "OK."

2. Select the Wi-Fi connection, then click the "Advanced" button.

3. In the "TCP/IP" tab, select "Using DHCP" from the dropdown by "Configure IPv4" and click "OK."

Rate this Article:
Documentation Category:
