Formatting Word Mail Merge Values in Excel
Occasionally some numbers in Excel don't format correctly in Word when using the mail merge feature under the Mailings tab. Follow these steps to resolve this issue before your merge.
1. First, make sure your ZIP or postal codes don't lose any zeros in the mail merge process by formatting them in your Excel file as text.
2. In Word, click the "File Tab" then click "Options."

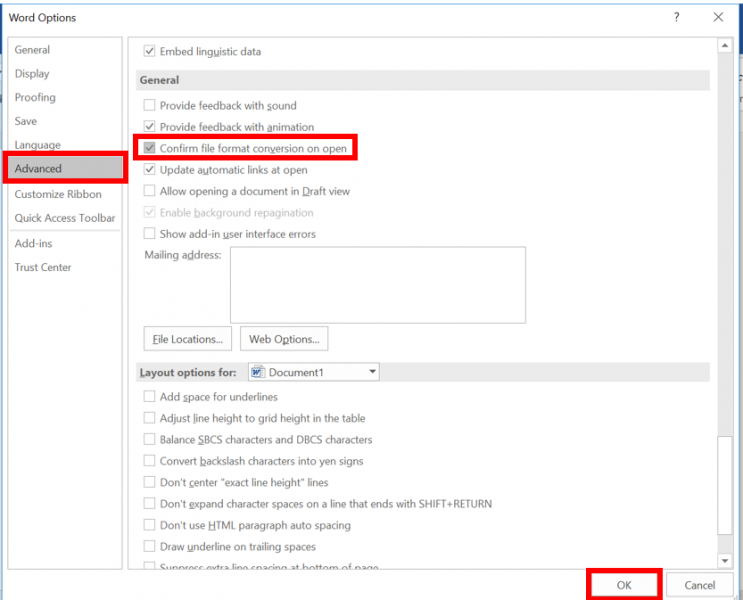
3. Choose "Advanced" from the left pane and select "Confirm file format conversion on open." Click "OK."

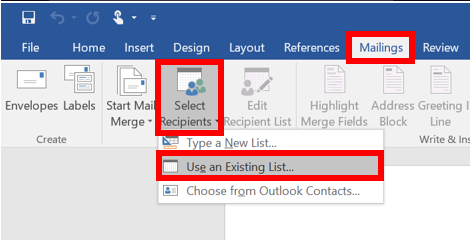
4. In the mail merge document, click the "Mailings" tab, "Select Recipients," then "Use an Existing List."

5. Browse to your spreadsheet and double-click it.
6. Click the "Show all" button in the "Confirm Data Source" window, select "MS Excel Woorkseets via DDE (*xls)" and select "OK."

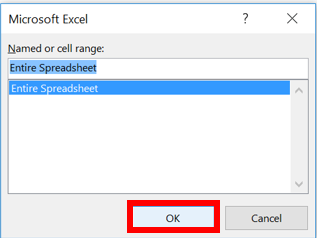
7. Click "Entire Spreadsheet" then click "OK."

8. Now you can continue with your mail merge.
1. First, make sure your ZIP or postal codes don't lose any zeros in the mail merge process by formatting them in your Excel file as text.
2. In Word, click the "File Tab" then click "Options."

3. Choose "Advanced" from the left pane and select "Confirm file format conversion on open." Click "OK."

4. In the mail merge document, click the "Mailings" tab, "Select Recipients," then "Use an Existing List."

5. Browse to your spreadsheet and double-click it.
6. Click the "Show all" button in the "Confirm Data Source" window, select "MS Excel Woorkseets via DDE (*xls)" and select "OK."

7. Click "Entire Spreadsheet" then click "OK."

8. Now you can continue with your mail merge.
Rate this Article:
Keywords:
