Create a Table of Contents in Word
This article covers how to create and update a Table of Contents in Microsoft Office Word 2016, though the steps are similar to those in 2013.
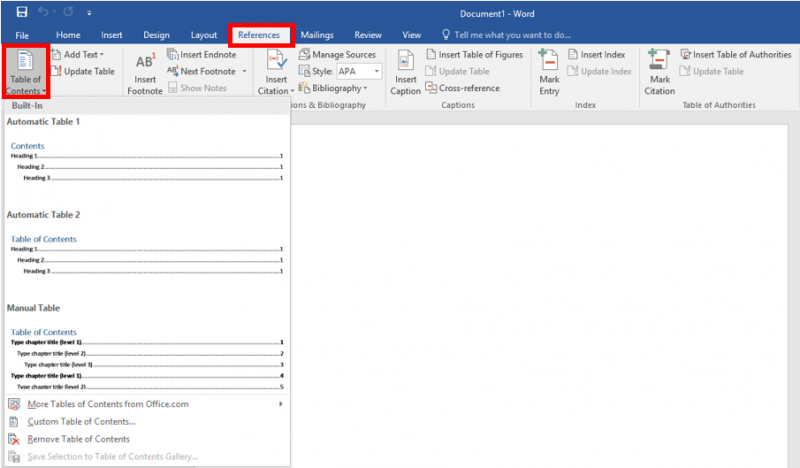
1. With your document open, select the "References" tab on the ribbon, then select "Table of contents. This will open a drop-down menu with table of contents options.

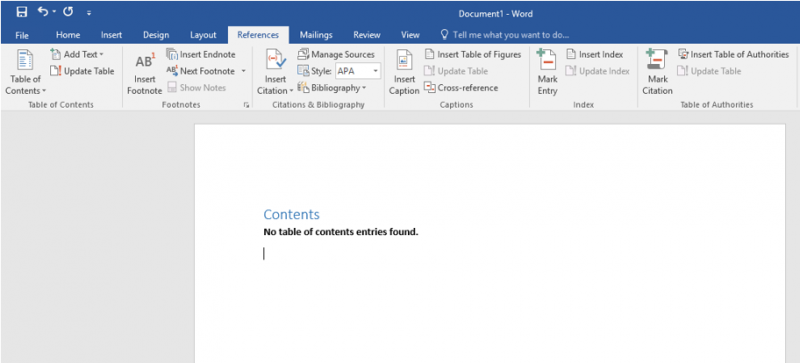
2. Choose a table and it should appear in your document.

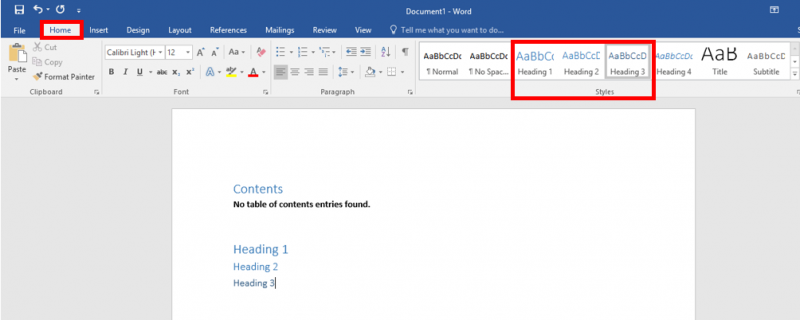
3. For the contents to appear in the table, your headers need to be a certain style. Under the "Home" tab on the ribbon, in the "Styles" section, use headings 1, 2, and 3 so they will appear in the table.

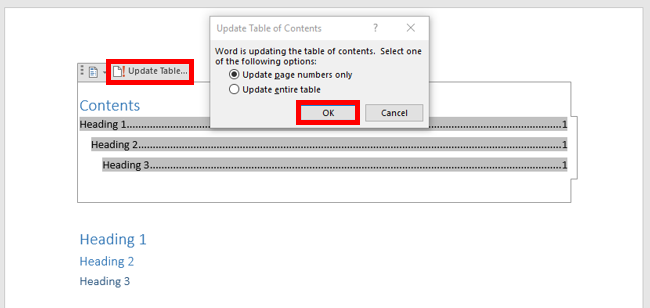
4. To update the table to your changes, click on the table and select "Update Table." You may have to do this periodically as you add and change headers in your document.

1. With your document open, select the "References" tab on the ribbon, then select "Table of contents. This will open a drop-down menu with table of contents options.

2. Choose a table and it should appear in your document.

3. For the contents to appear in the table, your headers need to be a certain style. Under the "Home" tab on the ribbon, in the "Styles" section, use headings 1, 2, and 3 so they will appear in the table.

- Style 1 will create headings
- Styles 2 and 3 will create consecutive sub-headings
4. To update the table to your changes, click on the table and select "Update Table." You may have to do this periodically as you add and change headers in your document.

Rate this Article:
