
Restoring files from external device
After a backup or switch to a new computer, you may want to restore files to the computer from the external hard drive or external memory device where you backed them up. Though these instructions for this process use Windows 10, the process is very similar in earlier versions of Windows.
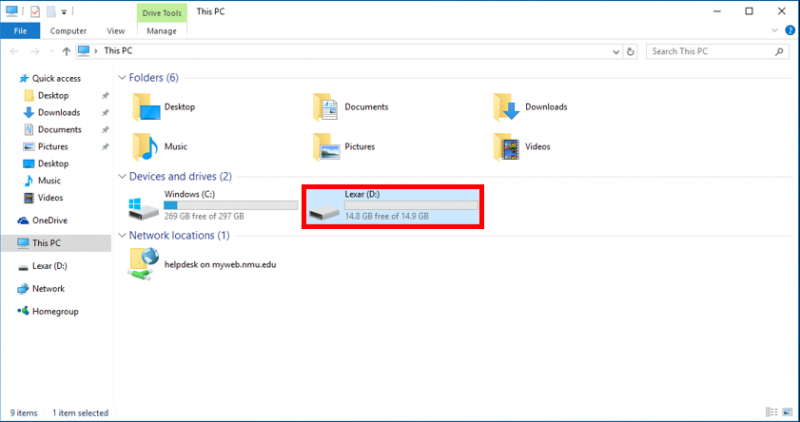
1. Connect your external device to your laptop. After a few moments it should show up in "This PC" or "Computer," depending on your version of windows. Open this by searching in the Start menu, clicking it on the desktop, or choosing it from the Windows Explorer navagation pane on the left side of any open folder.
2. Open your external hard drive or memory device under the "Devices and drives" section. In this case, it is the second listed drive, "Lexar (D)."
3. Now, open up a second window to show the files currently on your computer. Again, this can be done by selecting "This PC" or "Computer" from the desktop or in the Start menu. Click and drag each window to an opposite side of the screen and release your click to fit each screen to one opposite half of the screen.
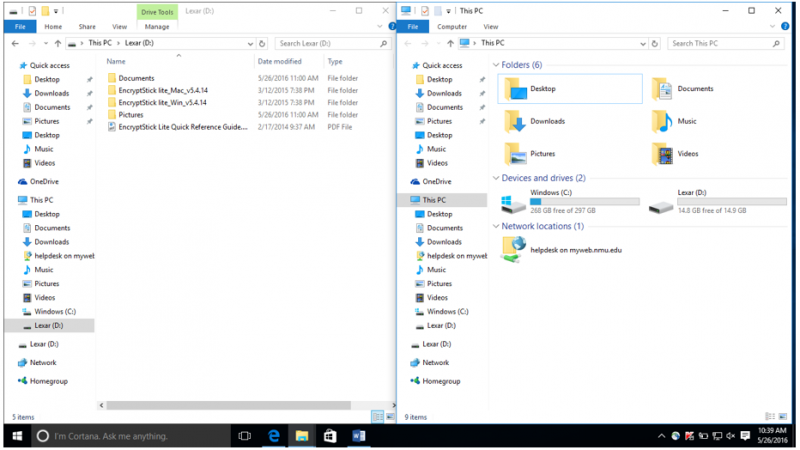
4. Copy the files you'd like on your computer from the external device window to the window containing files on your computer, wherever you'd like to store them, by clicking and dragging them.
- To drag and drop, left-click on the folder or file you'd like to move and hold down the left mouse button as you drag the item to your computer. Release the left mouse button when you've dragged the item to where you want to store it.
- You can highlight mulitple items by clicking around the group of items and dragging to select multiple (they will turn blue.) Click any of the items, hold, and drag to move them. Holding the Ctrl key while clicking to select multiple files will highlight them and allow you to drag and drop them as a group.