Inserting Objects in Word
Word allows for the insertion of many objects, and this article will guide you through a few of these. Though these instructions use Word 2016, the instructions are comparable to older versions.
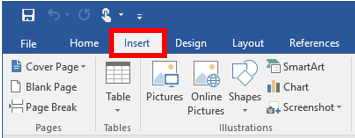
To begin, open a new or existing Word document, and click "Insert" on the menu bar, as shown below. Then, choose one of the topics below for more information on the specific object to insert.
Inserting Hyperlinks
1. Select "Hyperlink" from the center of the ribbon.

2. A new window will open. Fill in the "Text to Display" field with the words you would like in the document and "Address" with the website you would like the words to link to.
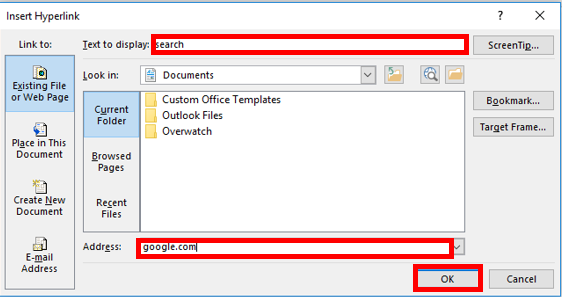
3. After you select "OK," a link will be added to your document. You can follow these links from the document by holding the Ctrl key and left-clicking the link.

2. A new window will open. Fill in the "Text to Display" field with the words you would like in the document and "Address" with the website you would like the words to link to.

3. After you select "OK," a link will be added to your document. You can follow these links from the document by holding the Ctrl key and left-clicking the link.
Inserting Header or Footers
1. Click on "Header" or "Footer" as shown below. The process will be the same for either, but it will affect a different part of the document.
2. An option box will open, prompting you to select from a few options for header or footer layout (depending on the one you chose to insert). For this example, the first option was chosen.
3. After selecting the option that works best for your purposes, a [Type here] field similar to the one below will appear on your document. There is also a new menu bar called "Header & Footer Tools" where you can change the settings as desired.

4. You will also be able to add text to the header or footer by clicking in the field and typing. Change alignment or edit header or footer tesk with the options on the "Home" tab.
3. After selecting the option that works best for your purposes, a [Type here] field similar to the one below will appear on your document. There is also a new menu bar called "Header & Footer Tools" where you can change the settings as desired.

4. You will also be able to add text to the header or footer by clicking in the field and typing. Change alignment or edit header or footer tesk with the options on the "Home" tab.
Inserting Page Numbers
1. In the "Insert" tab on the ribbon menu click "Page Numbers."
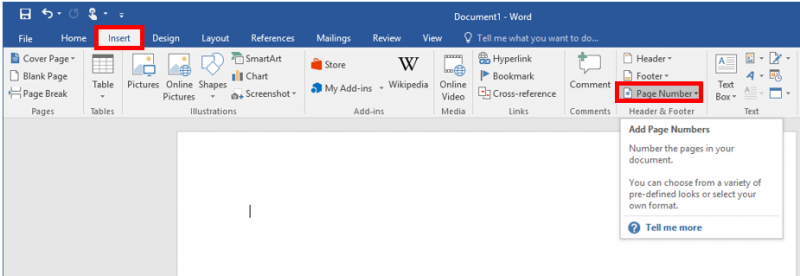
2. Select the location where you would like the numbering to appear, and select "Format Page Numbers" to change settings.

3. Change the formatting to your preferences and select "OK."


2. Select the location where you would like the numbering to appear, and select "Format Page Numbers" to change settings.

3. Change the formatting to your preferences and select "OK."

Inserting Pictures
1. Under "Insert" tab on the ribbon menu, select "Pictures" from the ribbon.
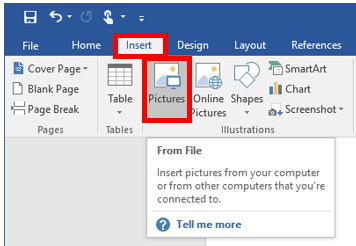
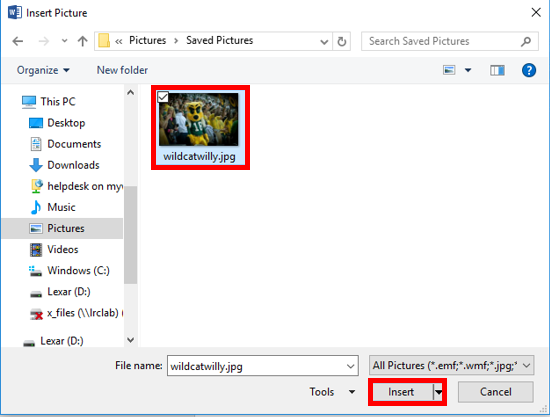
2. A new window will open and from there you'll be able to select the picture you want to add to your document. Navigate the folders on your computer to the left until you find the picture, select it, and click "Insert."

2. A new window will open and from there you'll be able to select the picture you want to add to your document. Navigate the folders on your computer to the left until you find the picture, select it, and click "Insert."

Rate this Article:

