
Using Server-Side Filters to Manage/Organize Email
Server-side filters work on mail as it comes in to your mailbox on the ITS mail servers. When you access your mail, no matter what IMAP program you use, the filtering has already been done for you. 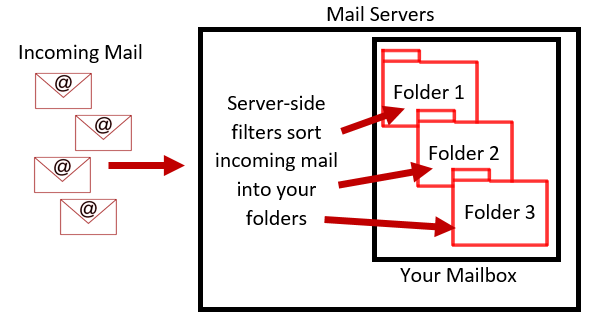
The advantage of server-side filters, as compared to filters that you set up inside your e-mail program, is that they work on the mail server when your mail is delivered—before you access your mail. That's especially helpful if you use multiple programs to access your mail. The filters work, no matter which IMAP program you use to access your mail. (POP mail programs are the exception to this. POP programs download mail from the INBOX only and cannot access other folders stored on the mail servers.)
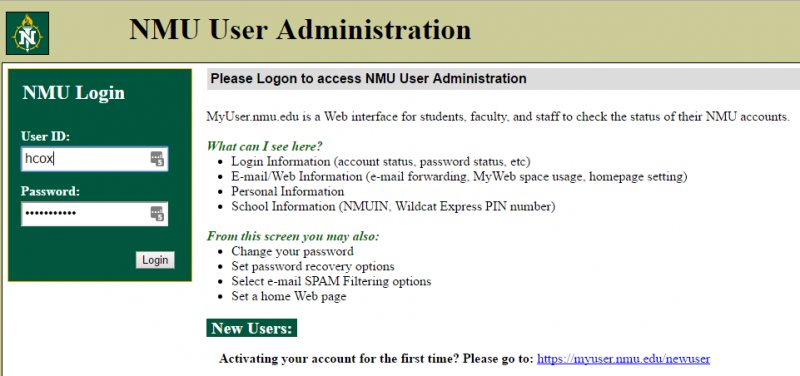
Change Server-Side Filter Settings1. Navigate to https://myuser.nmu.edu/user and log in with your NMU UserID and password.
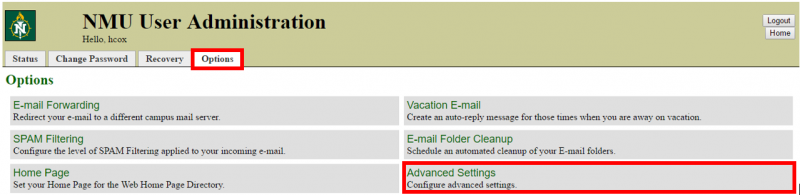
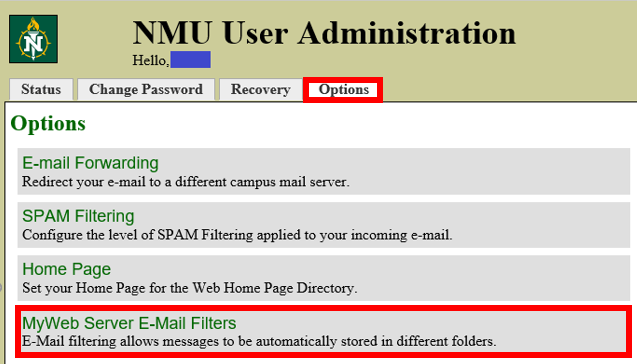
2. Click the "Options" tab, then select "Advanced Settings."
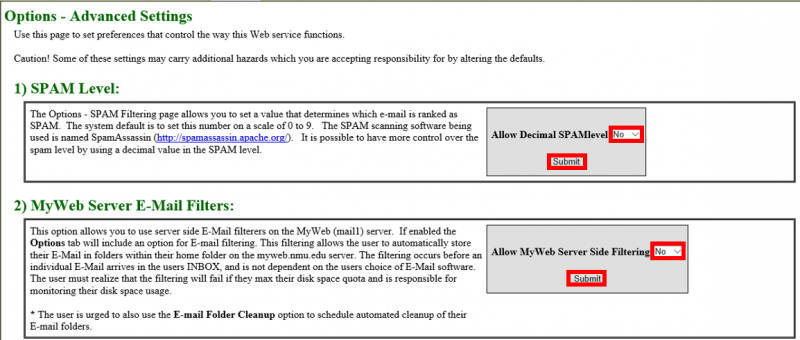
3. Change both drop-down menus to "Yes" and click "Submit" for each.
4. Click the "Options" tab. Click the new "MyWeb Server E-Mail Filters" option.
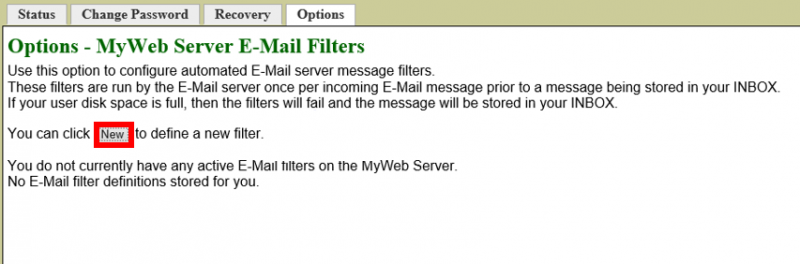
5. Click "New" to define a new filter.
6. From the "Header" drop-down meu, select the part of the message you want your filter to look for. Add the text you want your filter to look for in the "Contains" box, then select the folder you want the filtered mail to go to from "Destination Folder."

7. Click "Submit."
8. Click "Apply" and then "Continue" to activate the filter.
2. Click the "Options" tab, then select "Advanced Settings."
3. Change both drop-down menus to "Yes" and click "Submit" for each.
4. Click the "Options" tab. Click the new "MyWeb Server E-Mail Filters" option.
5. Click "New" to define a new filter.
6. From the "Header" drop-down meu, select the part of the message you want your filter to look for. Add the text you want your filter to look for in the "Contains" box, then select the folder you want the filtered mail to go to from "Destination Folder."
7. Click "Submit."
8. Click "Apply" and then "Continue" to activate the filter.
Rate this Article:
Keywords:
Documentation Category: