
Using Presenter's View in PowerPoint
This page outlines the many useful features in using the Presenter's View in PowerPoint.
1. PowerPoint 2013 will automatically be in presenter's view when connected, but if you are using PowerPoint 2007 or 2010 versions, you will have to put your computer in extended mode once connected to the projector.
2. Once you have started the presentation, you can see the area at the top provides settings to view the Windows Taskbar, change your display settings and end the slideshow presentation. A clock showing the current time as well as how long you have been presenting is also displayed so you don't have to find a clock in the room or guess how long you have taken for your presentation.

3. On the right side of the screen you can see the next slide in the presentation.

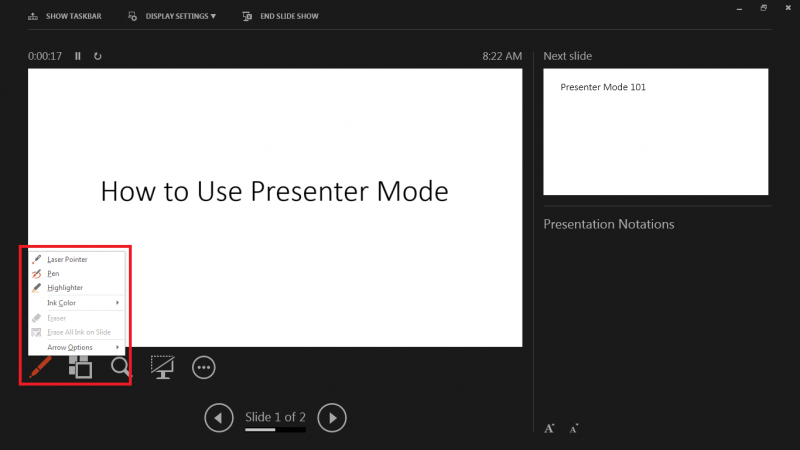
4. Click on the marker to bring up options that allow you to draw on the PowerPoint, as well as use a virtual laser pointer.
5. The highlighted button near the bottom will show all the slides within your presentation. From here, clicking on any slide will full screen that slide.

6. By clicking on the magnifying glass, it will bring up a small box, which can be used to zoom in on portions of the slide in the presentation. Then clicking the same button again will return the view back to normal.

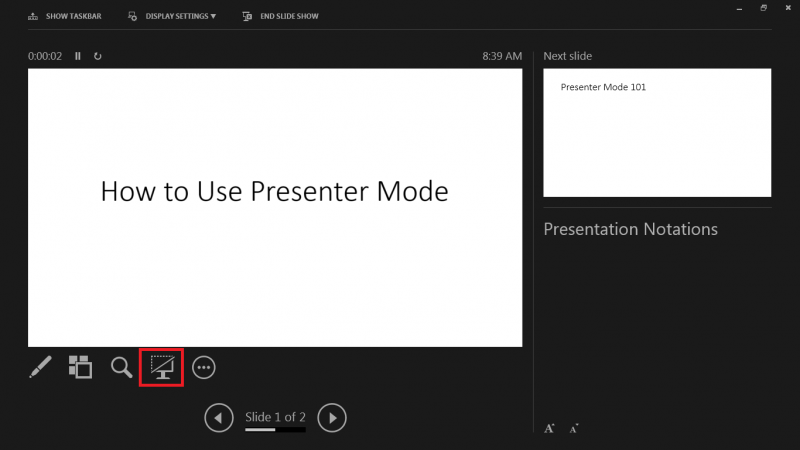
7. This button will turn the screen black for the audience, so that the focus would be on you, the presenter, instead of the PowerPoint.
8. The arrows on the bottom of the screen allow you to proceed to the next slide, or move backwards in the presentation.

2. Once you have started the presentation, you can see the area at the top provides settings to view the Windows Taskbar, change your display settings and end the slideshow presentation. A clock showing the current time as well as how long you have been presenting is also displayed so you don't have to find a clock in the room or guess how long you have taken for your presentation.
3. On the right side of the screen you can see the next slide in the presentation.
4. Click on the marker to bring up options that allow you to draw on the PowerPoint, as well as use a virtual laser pointer.
5. The highlighted button near the bottom will show all the slides within your presentation. From here, clicking on any slide will full screen that slide.
6. By clicking on the magnifying glass, it will bring up a small box, which can be used to zoom in on portions of the slide in the presentation. Then clicking the same button again will return the view back to normal.
7. This button will turn the screen black for the audience, so that the focus would be on you, the presenter, instead of the PowerPoint.
8. The arrows on the bottom of the screen allow you to proceed to the next slide, or move backwards in the presentation.
Rate this Article:
Keywords: