Photo Editing in Word
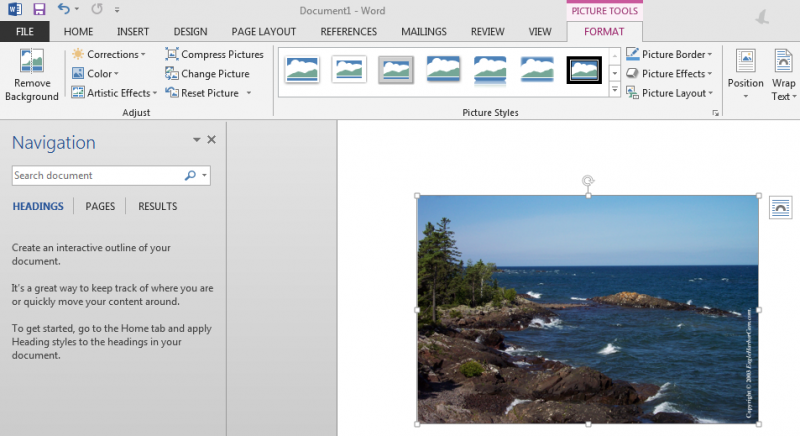
Microsoft Office has enhanced photo editing features to help when adding pictures in your documents. You can adjust the picture brightness or contrast, remove the background, use artist affects, add a border, rotate, crop or resize a picture. A preview of most of these features can be seen by hovering over the menu choice before you actually click on the menu choice.
1. Double-click on the image you have inserted into the Word document

2. Use the tools on the "Format" ribbon menu to make the alterations you desire
-The "Format" ribbon menu may look different depending on how large your Microsoft Word window is. All options are presented at all sizes, however some may be hidden in drop-down menu.

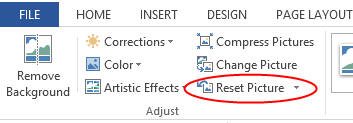
3. If you have made alterations that you do not like and want to reset the image, a simple way to do so it to use the "Reset Picture" option in the "Format" ribbon menu.

4. Explore the different options/effects and have fun making your document look good!

4. Explore the different options/effects and have fun making your document look good!
- Many changes can be previewed by simply hovering the mouse cursor over an option
- Not every type of editing option is available in Microsoft Word
- More advanced photo editing is best left to software designed for photo editing like Adobe Photoshop, GNU GIMP, Paint.NET, etc.
- Not every type of editing option is available in Microsoft Word
- More advanced photo editing is best left to software designed for photo editing like Adobe Photoshop, GNU GIMP, Paint.NET, etc.
Rate this Article:
