
Creating and Using Windows Sticky Notes
Sticky notes are already on your NMU ThinkPad and are useful tools for remembering information. Once you write on a sticky note it will contain that information when you restart your computer or after minimizing the notes.
1. To create your first sticky note, click the start menu icon in the lower left corner of your laptop screen or begin typing in the search bar.


2. Type "Sticky Notes" and press enter. A sticky note, like the one below, should appear on your desktop.
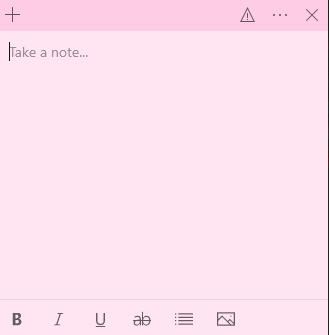
- Click the note and begin typing to add content.
- To choose a color option for your note, right click any empty text space to select the desired color.
- To delete the sticky note, press the "x" in the upper right corner.
- Re-size a note by clicking and dragging the lower right corner.
- Create a new note by pressing the "+" in the upper left corner.
- To bold text, press the key combination "Ctrl" + "B".
- To italicize text, press "Ctrl" + "I", and repeat the key combination to stop italicizing or bolding.
Rate this Article: