
Create a Table in Excel
Organizing your data in a table makes managing more data easier. Tables can be filtered and can allow for simpler calculations, among other advantages. This article outlines creating a table in Excel 2016, though the instructions are easily comparable to both 2013 and 2010.
1. In Excel, select the range of cells you wish to include in the table. These cells can be empty or can contain data and headings.

2. In the "Insert" tab and select "Table."
- Alternatively, in the "Home" tab under "Styles," select "Format As Table" and select the style from the drop-down menu.

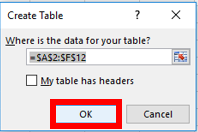
3. A small box defining the data range will appear. If the range of data that you selected contains headers then select "My Table has Headers."
Select "OK."
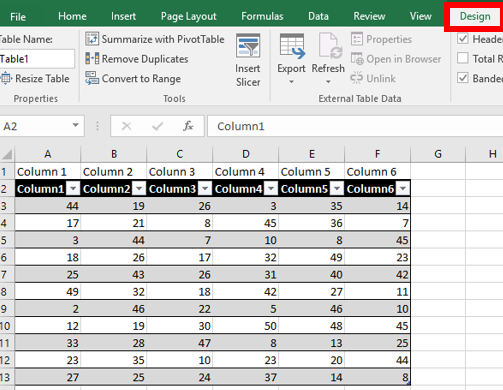
4. To personalize your table (optional) select the "Design" tab to change color schemes/themes and other properties.
Select "OK."
4. To personalize your table (optional) select the "Design" tab to change color schemes/themes and other properties.
Rate this Article: